About Me

My photo
Hello, my name is Ana. With many years of experience creating handmade ceramics and pottery and selling them on online marketplaces like Etsy and Amazon Handmade, I've gained a wealth of knowledge that I'd like to share with you.

Thursday, March 9, 2023

Why is Pottery Not Glazed on the Bottom? Explained

 Pottery is one of the oldest and most popular art forms in the world. From ancient times to modern-day, people have used pottery to create beautiful and functional objects. But have you ever noticed that most pottery is not glazed on the bottom? Have you ever wondered why? In this article, we will explore the reasons behind this common practice.

Pottery is made by shaping clay into various forms and then firing it in a kiln. Glazing is the process of applying a thin layer of glass to the surface of the pottery. The glaze not only adds beauty and color to the pottery but also makes it more durable and resistant to moisture.

However, pottery makers do not usually glaze the bottom of their pieces. Here are some reasons why:

    Prevents Sticking to the Kiln Shelf

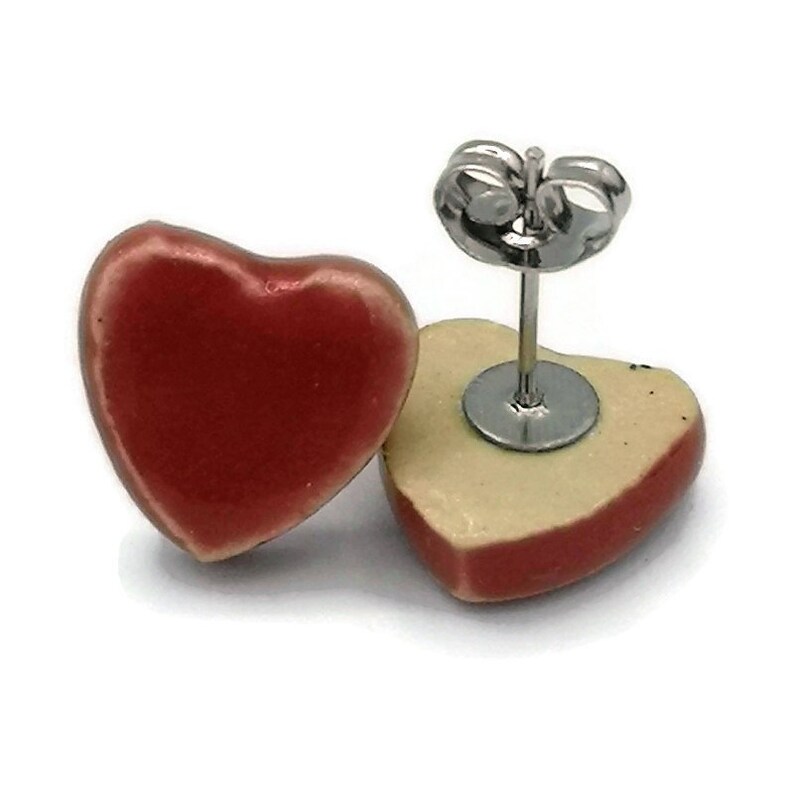
When pottery is fired in a kiln, it needs to be placed on a shelf. If the bottom of the pottery is glazed, it can stick to the shelf during firing, causing damage to both the pottery and the shelf. Leaving the bottom unglazed allows the pottery to be removed smoothly on the shelf.

Here is a video showing what happens when the glaze runs to the bottom of the piece.


    Aesthetics

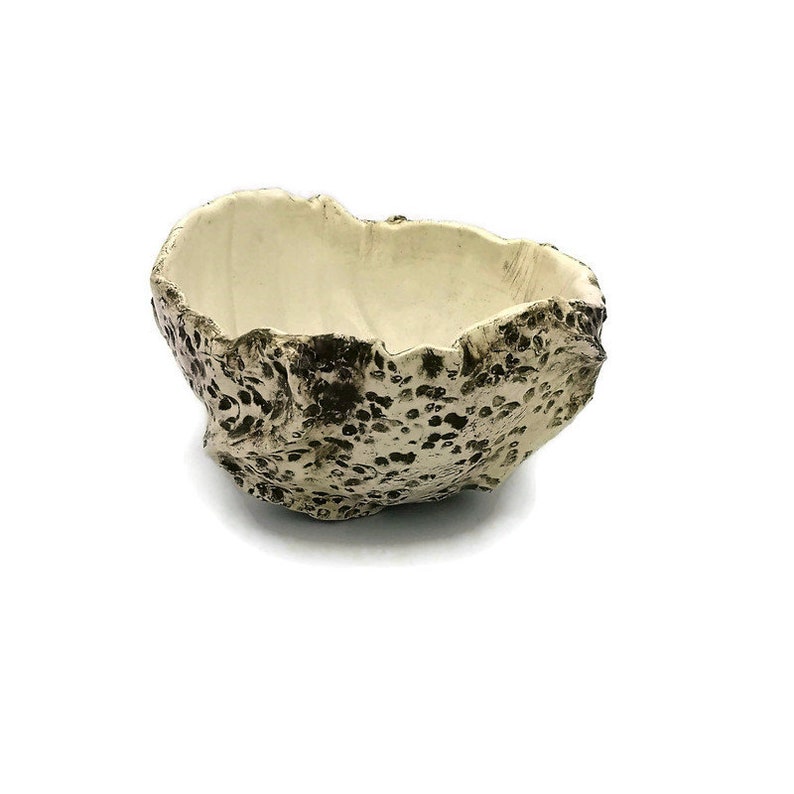
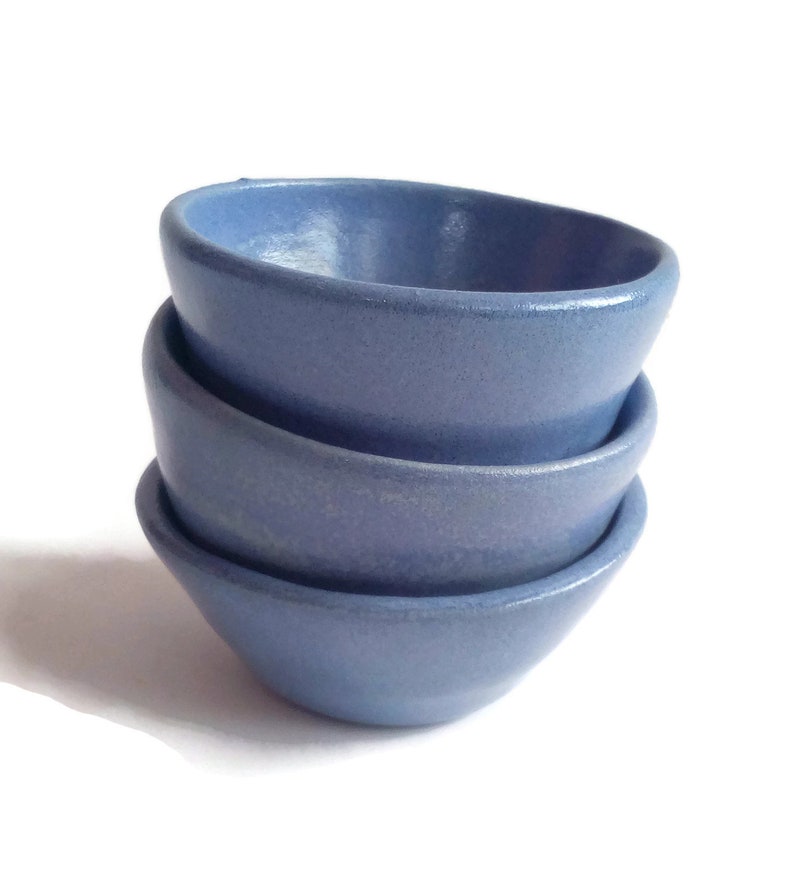
Pottery makers often leave the bottom unglazed for aesthetic reasons. The natural, unglazed surface of the pottery provides a beautiful contrast to the glazed surface and adds an organic, handmade feel to the piece.

In conclusion, the bottom of pottery is typically left unglazed for practical and aesthetic reasons. The rougher surface prevents sticking to the kiln shelf. Additionally, leaving the bottom unglazed adds to the beauty and organic feel of the piece. So, the next time you admire a piece of pottery, take a moment to appreciate the unglazed bottom and the thought and care that went into its creation.

Friday, March 3, 2023

The Art of Press Molding: Techniques, Tools, and Tips

 Press molding is a pottery-making technique that involves pressing clay into a mold to create a variety of forms, such as plates, bowls, and platters. While it may not have the same level of precision as wheel throwing, press molding allows for a high level of consistency and is a popular technique for potters of all skill levels. In this guide, we'll explore the world of press molding and offer tips and tricks for mastering the technique.


 What is Press Molding?
Press molding involves using a mold to shape clay into a specific form. The mold can be made of various porous materials, such as plaster or wood, and can be reused multiple times. Once the mold is prepared, the potter presses the clay into the mold, removes any excess clay, and then releases the molded form.You can buy a ready made mold or even build your own.


Tools Needed for Press Molding:
To get started with press molding, you'll need a few basic tools, including a mold, clay, and a rolling pin. You may also want to invest in a few specialty tools, such as a scraper or a trimming tool, to enhance your technique. Additionally, having a table that is flat and level is important for successful press molding.

Basic Pottery Tools


 Techniques for Press Molding:
The first step in press molding is to prepare your clay. Start by making a slab with an even thickness, then place the clay over the mold and press it into the shape of the mold. Be sure to remove any excess clay and smooth out any imperfections. Once the clay has been molded, it can be trimmed, decorated, and fired just like any other pottery form.


 Tips for Press Molding:
While press molding may seem straightforward, there are some tips and tricks that can help you create high-quality pieces. Here are a few to keep in mind:

    Choose a mold that is the right size and shape for your project.
    Use clay that is soft and pliable, but not too wet or too dry.
    Apply even pressure to the clay to ensure a consistent form.
    Smooth out any imperfections before firing.

Conclusion:
Press molding is a versatile and accessible pottery-making technique that can be learned by anyone with an interest in ceramics. With the right tools, techniques, and tips, you can create a variety of beautiful and functional objects. Whether you're a beginner or an experienced potter, press molding offers endless possibilities for creativity and expression.


Getting Creative with Wheel Throwing: A Guide to Making Unique and Personalized Pottery

 Wheel throwing is a classic pottery-making technique that has been around for centuries. With its satisfying rhythm and endless possibilities, it's no wonder that wheel throwing has become a beloved art form for many. In this guide, we'll take a deep dive into the world of wheel throwing, from basic techniques to advanced tips and tricks.


Tools Needed for Wheel Throwing:
To get started with wheel throwing, you'll need a few basic tools, including a pottery wheel, clay, water, and a variety of shaping tools. Some popular tools include a sponge, a rib, and a trimming tool. You may also want to invest in a few specialty tools, such as a throwing stick or a chamois cloth, to enhance your technique. You can also turn common objects into pottery tools, or even build your own tools.


Pottery tool kit


Techniques for Wheel Throwing:
The first step in wheel throwing is to prepare your clay. Start by centering the clay on the wheel, which involves applying pressure to the clay to make it symmetrical. From there, you can begin shaping the clay into your desired form. Common techniques include pulling up the clay to create walls, trimming the edges for a clean finish, and adding handles or other embellishments.


Tips for Wheel Throwing:
While wheel throwing can be a rewarding and relaxing experience, it can also be frustrating at times. Here are some tips to help you master the art of wheel throwing:

    Start with a small amount of clay to avoid overwhelming yourself.
    Keep your hands wet to prevent the clay from sticking.
    Use your body, not just your hands, to control the wheel.
    Practice, practice, practice!


Wheel throwing is a versatile and enjoyable pottery-making technique that can be learned by anyone with an interest in ceramics. With the right tools, techniques, and tips, you can create a variety of beautiful and functional objects. Whether you're a beginner or an experienced potter, there's always something new to learn about the art of wheel throwing.


Wheel Thrown Utensil Holder


Sunday, February 12, 2023

Slab Building: A Step-by-Step Guide to Creating Handmade Ceramic Pieces


Slab building is a popular hand-building technique in ceramics that allows you to create sturdy pieces of pottery. Whether you're looking to make plates, bowls, or any other functional or decorative pieces, slab building is a versatile and easy method to get started with.

To start with slab building, you'll need to have your clay ready. This involves wedging it to remove any air pockets and make it ready to work with. Then, you'll need to roll out the clay into flat, even slabs using a rolling pin or slab roller. You can also do it without any tools except your work table. The thickness of your slabs will depend on the desired size and shape of your piece.


Once you have your slabs ready, you can begin shaping them into the desired form. You can cut the slabs into various shapes using a pottery cutter or a knife, or even your hands. You can also use slabs to form the sides of your piece by draping them over a mold or using a potter's rib to smooth and shape them.


After shaping your slabs into your desired form, it's important to let them dry evenly. This will prevent cracking and ensure a strong and durable final product. You can then fire your piece in a kiln to turn it into a hardened, permanent ceramic piece.

Slab building is a simple and versatile hand-building technique in ceramics that can help you create functional and beautiful pieces of pottery. Whether you're a beginner or a seasoned potter, this technique is a great way to unleash your creativity and bring your ideas to life.

Saturday, February 11, 2023

Pinch Building: A Guide to Hand-Building a Pinch Pot


Pinch building is a traditional hand-building technique in pottery that allows you to shape and mold clay using only your fingers. Whether you're a beginner or a seasoned potter, this technique offers versatility and simplicity in creating functional and aesthetically pleasing pieces.

To start with pinch building, it's important to properly prepare your clay by wedging it. This process involves kneading and compressing the clay to remove any air pockets and make it ready to work with. Once your clay is ready, you can begin shaping it by pinching and molding it with your fingers.

To form the base of your piece, start by creating a small ball of clay and then pinch and shape it into a cone, cylinder, or any other desired shape. Then, you can continue building upon your piece by adding additional pieces of clay and pinching and shaping them until your pottery piece is complete.

It's important to keep your clay moist and allow it to dry evenly during the process to prevent cracking and ensure a strong and durable final product.


Pinch building is a wonderful technique to explore and bring your creative vision to life. With patience, the right materials and tools, you'll be able to create beautiful pottery pieces that you can be proud of.

Coil Building: A Guide to Hand-Building with Coils in Pottery

 Coil building, one of my favourite creation methods, is a hand-building technique that involves rolling out long, thin ropes of clay and then coiling them together to form a sturdy base for your pottery piece. This technique is simple, versatile, and perfect for beginners and experienced potters alike. In this article, we will explore the basics of coil building and help you create beautiful and functional pieces.

Coil Built Bottle


The first step in coil building is to prepare your clay. This can be done by wedging, which involves kneading and compressing the clay to remove any air pockets and ensure it's ready to work with. Once the clay is ready, roll it out into long, thin coils that are uniform in size.


Next, you'll begin coiling the clay by placing the first coil on a flat surface and then adding subsequent coils on top, pressing them firmly together to ensure a strong bond. You can continue coiling until the base of your pottery piece is the desired size and thickness.

Once the base is complete, you can use your hands and tools to shape and smooth the surface of the clay. You can also add texture or decorative elements by pressing or carving into the surface.

When working with coils, it's important to keep the pieces moist and to allow them to dry evenly. This will help prevent cracking and ensure a strong and durable final product.


Coil building is a simple and effective hand-building technique that is perfect for creating beautiful and functional pottery pieces. Whether you're a beginner or an experienced potter, coil building is a fun and rewarding process that allows you to bring your creative vision to life. With the right tools, materials, and a bit of patience, you'll be able to create stunning pieces that will be treasured for years to come.

Monday, February 6, 2023

Choosing the Right Technique for Molding Your Clay: A Guide for Potters and Ceramists


Molding clay is an essential part of the pottery-making process, and choosing the right technique is crucial for getting the desired results. There are several methods for molding clay, including hand-building, wheel-throwing, slip casting, and press molding, to name a few. In this guide, we will explore the different techniques and help you determine the best method for your project.

Hand-building is a versatile and flexible method that can be used to create a wide range of shapes and forms. This technique involves using your hands, tools, and simple molds to shape the clay into the desired form. Hand-building is often used by beginners and is an excellent way to learn the basics of pottery-making.

Wheel-throwing is a more advanced technique that involves using a potter's wheel to shape the clay. This method is best suited for creating symmetrical and uniform pieces and is often used to create bowls, cups, and vases. Wheel-throwing requires a lot of practice and skill, but the results can be stunning.

Slip casting is a method that involves pouring liquid clay, known as slip, into a mold and allowing it to harden into a solid form. This technique is best suited for creating precise and detailed pieces and is often used for mass production.

Press molding is a technique that involves pressing a piece of clay into a mold to create a repeating pattern or design. This method is often used for creating tiles, reliefs, and other decorative elements.

In conclusion, choosing the right technique for molding your clay will depend on the desired outcome, your skill level, and the materials and tools available to you. By exploring the different methods, you'll be able to determine the best technique for your project and create beautiful and well-formed pieces. Whether you're a beginner or an experienced potter or ceramist, molding your clay is a fun and rewarding process that can bring your creative vision to life.

The Ultimate Guide to Wedging Clay: Techniques and Tips for Potters and Ceramists

Wedging clay is an essential step in the pottery-making process. It removes any air pockets and inconsistencies in the clay, ensuring a smooth and uniform consistency for your pieces. Wedging also helps to improve the workability and plasticity of the clay, making it easier to handle and work with. In this guide, we will explore the basics of wedging clay and provide tips and techniques to help you get the best results.

First and foremost, it's important to have a good working surface to wedge your clay on. This can be a wedge board, a plaster table, or any flat surface that is a bit rough to prevent the clay from slipping. Before you start wedging, make sure your clay is at the right consistency and not too wet or too dry.

To wedge your clay, start by placing it in the center of your working surface and use your hands to flatten it out. Then, use a kneading motion to fold the clay over onto itself, and repeat this process several times. As you wedge, use your weight and the force of your body to work the clay and eliminate any air pockets.Watch the following video to better understand how to wedge your clay.


It's important to wedge your clay thoroughly to ensure that it is ready for use. This process can take several minutes, and it's essential to be patient and persistent. Wedging can be an enjoyable and meditative process, and with practice, you'll be able to get a feel for the right consistency and know when your clay is ready.

Wedging clay is a critical step in the pottery-making process that helps to ensure a smooth and uniform consistency for your pieces. By following these tips and techniques, you'll be able to wedge your clay effectively and create beautiful and well-formed pieces. Whether you're a beginner or an experienced potter or ceramist, wedging your clay is a skill that is well worth developing.


Friday, February 3, 2023

Creating a Strong Online Presence for Your Handmade Business: Tips and Best Practices


Establishing an online presence is a crucial step for selling handmade products and reaching a wider audience. A well-designed website that showcases your products and provides a seamless shopping experience can help you attract and retain customers. In this article, we will dive deeper into how to create a strong online presence for your handmade business and optimize it for search engines like Google.

  1. Choose the Right Platform 

    When it comes to creating an online presence, choosing the right platform is key. There are many website builders and e-commerce platforms to choose from, each with its own features and pricing options. Consider factors such as ease of use, customization options, payment options, and scalability when selecting a platform. You may also want to consider using a platform that integrates with other tools you may use, such as social media and email marketing.

  2. Design a Professional Website 

    A well-designed website is essential for attracting and retaining customers. Choose a template that aligns with your brand and offers a seamless shopping experience. Make sure to include high-quality images of your products, detailed product descriptions, and clear calls to action. Consider the user experience and make sure your website is easy to navigate and has a fast loading speed.


  3. Optimize for Search Engines 

    Optimizing your website for search engines is crucial for increasing your online visibility and attracting new customers. Use relevant keywords in your product descriptions, titles, and meta tags, and make sure your website is mobile-friendly and has a fast loading speed. Regularly updating your website with new products and blog posts can also help improve your search engine ranking.


  4. Use Social Media to Drive Traffic 

    Social media is a powerful tool for promoting your handmade products and driving traffic to your website. Choose the platforms that your target audience is most active on and create a consistent brand presence by posting regular updates and engaging with your followers. You can also use social media to offer exclusive promotions and drive sales to your website.


  5. Implement a Blog 

    Blogging can help improve your search engine ranking, attract new customers, and establish your brand as an authority in your niche. Write about topics that are relevant to your target audience, such as how you make your products, what sets your products apart, and why they should choose handmade goods over mass-produced products.


  6. Utilize Email Marketing 

    Email marketing is a cost-effective and targeted way to reach your customers and promote your products. Build an email list by offering incentives, such as exclusive promotions or early access to new products, and use it to keep customers engaged and informed about your business. Make sure to comply with email marketing regulations, to avoid spamming your subscribers.


Creating a strong online presence is essential for selling handmade products and reaching a wider audience. By following the tips and best practices outlined in this article, you can build a professional website, optimize it for search engines, and utilize social media, blogging, and email marketing to attract and retain customers. Investing in a strong online presence will help you grow your business and reach new customers in the online marketplace.

Maximizing Your Online Sales: A Guide to Selling Handmade Products

As a handmade artist or crafter, selling your products online is a great way to reach a wider audience and grow your business. The online marketplaces are highly competitive, but with the right strategy, you can stand out from the crowd and attract customers who appreciate the unique and personal touch of handmade goods. In this article, based on my experience of several years selling my handmade ceramics and pottery on online marketplaces, I will provide you with practical tips and best practices for selling handmade products online and maximizing your sales,whether you are selling ceramics, macrame or jewelry. 


  1. Establish Your Online Presence 

    The first step in selling handmade products online is to create a strong online presence. Choose a website builder or e-commerce platform that is easy to use and offers features that suit your needs, such as customizable templates, product management tools, and payment options. A well-designed website that showcases your products and provides a seamless shopping experience can help you attract and retain customers.

  2. Optimize for Search Engines 

    Optimizing your website for search engines like Google is crucial to increasing your online visibility and attracting new customers. Use relevant keywords in your product descriptions, titles, and meta tags, and make sure your website is mobile-friendly and has a fast loading speed. Additionally, regularly updating your website with new products and blog posts can help improve your search engine ranking and keep customers engaged.

  3. Build a Social Media Following 

    Social media is a powerful tool for reaching a wider audience and promoting your handmade products. Choose the platforms that your target audience is most active on and create a consistent brand presence by posting regular updates and engaging with your followers. You can also use social media to drive traffic to your website and offer exclusive promotions to your followers.

  4. Offer Unique and High-Quality Products 

    In a crowded online marketplace, offering unique and high-quality products is key to standing out and attracting customers. Take the time to carefully craft and refine your products, and make sure to highlight the unique aspects and quality of your handmade goods in your product descriptions and marketing materials.

  5. Price Your Products Competitively 

    Pricing your handmade products correctly is important for both attracting customers and maximizing your profits. Research your competition and consider the cost of materials, time, and labor when setting your prices. Offer promotions and discounts to encourage customers to make a purchase, but be careful not to undervalue your work.

  6. Provide Excellent Customer Service 

    Providing excellent customer service is essential to building a loyal customer base and growing your online business. Respond promptly to customer inquiries and feedback, and be transparent and honest in your communication. Offer hassle-free returns and exchanges, and go above and beyond to ensure that your customers are satisfied with their purchases.


Selling handmade products online is a great way to reach a wider audience and grow your business, but it takes hard work and a strong strategy to succeed. By following the tips and best practices outlined in this article, you can maximize your online sales and build a loyal customer base that appreciates the unique and personal touch of your handmade goods.

Saturday, January 28, 2023

The Fundamentals of Clay: Understanding Types and Properties of Clay for Beginners


Clay is a natural material that has been used for thousands of years in pottery, ceramics, and other crafts. It is a versatile and fundamental material that can be shaped, molded, and transformed into a wide variety of forms.

Clay is made up of tiny mineral particles that are found in the earth. It is composed mainly of aluminum silicates, such as kaolinite, halloysite, and illite, but it may also contain other minerals like feldspar, quartz, and mica. The properties of clay vary depending on its composition, the location it was mined, and how it has been processed.

When working with clay, it's important to understand that it is a living material that can be affected by its environment. Clay can absorb moisture and humidity, which can affect its plasticity and workability. It's essential to store clay in a dry place, and if it becomes too wet or too dry, it can be reclaimed by adding water or dry clay powder. Another important factor to consider is the shrinkage rate of the clay. All clay shrinks as it dries and during the firing process, and it's essential to take this into account when creating large or complex pieces.

Furthermore, it's important to note that although clay is safe to use, once it dries the resulting dust can be dangerous for your health. It's essential to use a mask and ventilate the space when dealing with clay dust.

There are many different types of clay available, each with unique properties and characteristics that make them suitable for different techniques and projects. Whether you are a beginner or an experienced potter, there is a type of clay that will suit your needs and skill level.

In conclusion, clay is a versatile and fascinating material that has been used for thousands of years in pottery and ceramics. It offers a wide range of possibilities and techniques that can be used to create beautiful and unique pieces. Understanding the properties and characteristics of clay can help you choose the right type for your project, and with a little care and patience, you can create beautiful and lasting pottery and ceramics.


A piece of white clay and some pottery tools.


Exploring the Different Types of Clay for Pottery and Ceramics: A Guide to Earthenware, Stoneware And Porcelain

Clay is a versatile and fundamental material in pottery and ceramics. There are many different types of clay available, each with unique properties and characteristics that make them suitable for different techniques and projects.

  1. Earthenware clay: This is a type of low-fire clay that is easy to work with and is suitable for beginners. Earthenware clay has a porous texture and is typically fired at temperatures between 1,800 and 2,200 degrees Fahrenheit. It is the most comun clay and can be used for wheel throwing, hand-building, and sculpting pottery.

  2. Stoneware clay: This is a type of high-fire clay that is more durable and stronger than earthenware clay. Stoneware clay is fired at temperatures between 2,200 and 2,400 degrees Fahrenheit, making it more resistant to wear and tear. It is mostly used for pottery with practical uses like plates, bowls and vases.

  3. Porcelain clay: This is a type of ultra-high-fire clay that is extremely hard and strong. Porcelain clay is fired at temperatures between 2,400 and 2,800 degrees Fahrenheit, making it resistant to chipping and breaking. It is the better option for creating delicate objects such as fine bone china or figurines.

      Choosing the right type of clay for your project will depend on your skill level, the techniques you want to use, and the final result you want to achieve. By understanding the properties of different types of clay, you can create beautiful and unique pottery and ceramics.

    The 3 types of clay listed in this article can be easily found in craft stores or online. Each type is available in many colors and has different characteristics. Some will be better for sculpture, others for slab builting, for example.


    Alternatively, you can use air dry clay. It is a type of clay that does not need to be fired in a kiln to harden. Instead, it dries naturally at room temperature over a period of time, typically 24 hours or more, depending on the thickness of the piece. This type of clay is easy to use and does not require any special equipment, making it perfect for beginners and children. Air dry clay can be painted, glazed or decorated with various mediums like acrylic paint, markers, or even natural pigments. However, it is not as durable as kiln-fired clay, and it is more prone to cracking or breaking if not handled carefully, and it is not suitable for making functional pottery, like dishes or vases.


The Ultimate Guide to Choosing the Best Pottery Studio Table: Materials, Features, and Reviews

 When it comes to setting up a pottery studio, one of the most important pieces of equipment you will need is a sturdy and reliable table that is not going to slide around or bounce as you wedge. Not only will this table provide a solid surface for you to work on, but it will also need to be able to withstand the weight and pressure of wedging clay.
There are many different types of tables available for pottery studios, each with their own unique set of features and benefits. In this guide, we will take a look at some of the most popular materials and features to consider when choosing the best table for your pottery studio.

Wooden tables (the ones I use in my studio), are a popular choice for many pottery studios due to its natural look and warmth. Some of the pros of using a wooden table for pottery include:

  • Wood is a durable and strong material that can withstand the weight and pressure of wedging clay.
  • Wooden tables often have a rustic and charming aesthetic that can add to the overall atmosphere of a pottery studio.
  • They can be easily customized to fit the specific needs and style of the artist.

However, there are also some cons to consider when using a wooden table for pottery:

  • Wooden tables can be prone to warping and staining because they are left unsealed to work with clay.
  • They may require more maintenance than other materials in terms of cleaning.
  • They may not be as fire resistant as other materials, which is important for pottery studios that use kilns.

Overall, a wooden table can be a great choice for a pottery studio, but it's important to weigh the pros and cons and take the necessary steps to properly maintain and care for the table.


My wooden table, inside of my studio.

A plaster table is a less common option for pottery studios, but it does have some advantages over other materials. Some of the pros of using a plaster table for pottery include:

  • Plaster is a porous material that can absorb water, making it a good option for potters who like to keep their clay moist.
  • It can provide a smooth and stable surface that is ideal for shaping and forming pottery.
  • Plaster tables are heat-resistant, which makes them suitable for use with kilns.

However, there are also some cons to consider when using a plaster table for pottery:

  • Plaster tables can be quite heavy and difficult to move around, which can be a drawback for some potters.
  • They can be prone to cracking or chipping over time if not properly maintained.
  • Plaster tables may not be as durable as other materials like wood or metal.

Overall, a plaster table can be a good option for pottery studios that are looking for a smooth and stable surface for shaping and forming pottery, but it's important to be aware of its cons and take the necessary steps to properly maintain and care for the table.


If you are just starting out, have limited space, and want to save some money, a wedging table is an extra expense, but there are simple and inexpensive ways to create the perfect wedging surface for your studio. The surface should have some grip and be absorbent, but not too much to avoid drying out the clay.

Consider using a stretched piece of canvas over an old table or dresser. Use an upholstery staple gun to attach canvas to the table surface.

Or repurpose an old baby changing table by filling it with plaster or concrete.


 Additionally, it's worth considering the height of the table. A table that is too low can cause strain on the back and shoulders, while a table that is too high can make it difficult to reach the clay. Ideally, the table should be at a height that allows you to comfortably work without straining your body.
When it comes to features, some tables come with built-in storage, such as shelves or drawers, which can be very convenient for storing tools and supplies. Other tables may have adjustable legs, allowing you to customize the height to suit your needs.
In conclusion, when choosing the best table for your pottery studio, it's important to consider the material, size, shape, height, and features that will best suit your needs. With so many options available, it's important to do your research and read reviews from other potters before making your final decision.


DIY Ceramics: How to Make Your Own Ceramic Pieces at Home Step By Step

 Ceramics is a fun and creative hobby that allows you to make your own unique pieces of art. Whether you're a beginner or have experience with pottery, making ceramics at home is a great way to express your creativity and explore your artistic side.

What tools you will need to start making pieces:

1.A table

2.Clay

   2.1. Choose the type of clay

   2.2.Wedge your clay

   2.3. Decide what thecnique you will use to mold the clay

         2.3.1. Handbuilt

         2.3.2. Coil building

         2.3.3. Pinch building

         2.3.4. Slab building

         2.4.4. Throwing

         2.4.5. Press Molding

         2.4.6. Slip Casting

3.Basic tools

   3.1.Needle tool, a potter's rib, a sponge, and a cutting wire

   3.2.Rolling pin and sticks

4.Potters wheel

5.Decorative paint and glazes 

   5.1.Slip

   5.2.Underglaze

   5.3.Oxide stains

   5.4.Glazes

   5.5. Acrylic Paint

6.A kiln

7. Pugmill


Unglazed ceramic pieces


One of the best things about making ceramics at home is that you don't need a lot of expensive equipment to get started. All you really need is some clay, a few basic tools, and a kiln. You can find clay at most art supply stores or online, and you can purchase or make your own basic tools, such as a needle tool, a potter's rib, and a cutting wire.

Before you begin making your own ceramics, it's important to understand the basics of working with clay. Clay is a natural material that is made essentialy of silica, alumina or magnesia or both, and water and other particles. It can be formed into a variety of shapes and sizes, and it can be decorated and glazed to create a variety of different effects.

When working with clay, it's important to keep it moist and wedge it until it is smooth and pliable. In addition to the potter's wheel, you can use a variety of techniques to shape the clay, such as coiling, and pinching. Once you have the desired shape, you can then decorate the piece with textures, impressing, sgraffito, wax resist, and brushwork (using slip, oxide, or underglaze).

Once your piece is complete, it will need to be fired in a kiln. This is a process that hardens the clay and makes it durable. You can fire your ceramics in a variety of different ways, including using a gas or electric kiln or even building your own kiln. In the beginning, you can also opt to fire your pieces in a community studio.

Making ceramics at home is a fun and rewarding hobby that can be enjoyed by people of all ages and skill levels. With a little bit of creativity and patience, you can create beautiful and unique pieces that will last for years to come.


Handmade Ceramic Bowls, Slab Built, With Vintage Lace Texture, Painted With Undergale And Glazed With A Glossy Transparent Glaze


Friday, January 27, 2023

The Symbol of 9 Years of Marriage: Understanding the Meaning Behind the Pottery Gift

When it comes to commemorating a milestone in a marriage, one of the most traditional symbols is pottery. The ninth year of marriage is particularly significant, and many couples choose to celebrate this occasion with a pottery gift. But why is pottery considered a symbol of nine years of marriage?

Pottery is a symbol of the strength and endurance of a marriage. Just like pottery is formed from clay and molded into a final product through heat and pressure, a marriage also goes through a process of growth and change. It takes time, effort, and patience to form a strong and lasting bond between two people. Pottery represents the resilience and durability of a marriage, and it reminds us that, like pottery, a marriage can be beautiful and functional even after going through the test of time.

Additionally, pottery is a symbol of creativity and artistry. Just like pottery is crafted by skilled artisans, a marriage is also a work of art that requires creativity and attention to detail. Each piece of pottery is unique and reflects the personality and style of the artisan who created it. Similarly, each marriage is unique and reflects the personalities and styles of the couple who built it.

Gifting pottery to your partner on your 9 years of marriage is a great way to show them how much you care and appreciate the journey you have shared together. Handmade ceramic gifts are particularly special, as they are unique, functional, and will last a lifetime, just like the memories of your 9 years of marriage.

Ceramic Red Heart Stud Earrings


Ceramic Cufflinks: The Perfect 9-Year Anniversary Gift for Men


A 9-year anniversary is a significant milestone in any relationship, and finding the perfect gift can be a challenge. If you're looking for something unique and meaningful, being pottery and willow the traditional symbols of nine years of marriage, consider handmade ceramic cufflinks. These cufflinks are not only stylish but also functional and durable, making them a great gift for any man.

Hand Painted Blue Evil Eye Cufflinks


Ceramic cufflinks are a unique and elegant gift that will add a touch of sophistication to any outfit. They are made with high-quality materials and are handcrafted by skilled artisans, ensuring that each pair is one of a kind. The intricate details and textures of the ceramic material add a touch of personality to any outfit, and they can be worn on formal or casual occasions.

blue star initial cufflinks and gift box with a blue ribbon
Custom Blue Star Cufflinks
 

Handmade ceramic cufflinks are also a functional gift that can be worn every day. Unlike other cufflinks that are made with fragile materials, ceramic cufflinks are durable and can withstand daily wear and tear. They also come in a variety of colors and designs, making it easy to find a pair that suits the recipient's personal style.

In addition, buying handmade ceramic cufflinks supports local artisans and keeps traditional techniques alive. By purchasing handmade ceramics, you are not only getting a beautiful and functional object, but you are also supporting an artist and a craft.

In conclusion, handmade ceramic cufflinks are the perfect 9-year anniversary gift for men. They are unique, elegant, and functional, and they are a great way to show your loved one how much you care. Plus, by supporting local artisans, you are also giving back to the community.

The Art of Handmade Ceramics: Techniques and Benefits


Handmade ceramics have been around for centuries, and they continue to be a popular medium for both art and functional objects. Artisan ceramics are not only beautiful but also functional and durable. In this post, we will explore the techniques and benefits of handmade ceramics.

First, let's talk about the techniques used in artisan ceramics. The most common technique is wheel-throwing, which involves shaping the clay on a spinning wheel. Another technique is hand-building, which involves shaping the clay by hand without the use of a wheel. Both techniques require skill and patience, but the end result is a unique and beautiful piece of art.

Handmade Ceramic Pieces


Handmade ceramics also have many benefits. They are durable and can withstand daily use, which makes them perfect for functional objects like dishes, mugs, and vases. They also have a unique beauty that can't be replicated by mass-produced ceramics. Each piece is one of a kind and has its own character and charm.

In addition, buying handmade ceramics supports local artisans and keeps traditional techniques alive. By purchasing handmade ceramics, you are not only getting a beautiful and functional object, but you are also supporting an artist and a craft.

In conclusion, handmade ceramics are a beautiful and functional medium that has stood the test of time. They offer a unique beauty and durability that can't be replicated by mass-produced ceramics. Supporting local artisans and traditional techniques is also an added bonus.

Handmade Ceramic Bottle


Top Selling Pottery Styles: From Hand-Thrown to Hand-Painted Ceramic Sculptures


Pottery is a beautiful and versatile medium that can be used to create a wide variety of functional and decorative pieces. However, not all types of pottery sell equally well. Here are 5 types of pottery that tend to be popular with buyers:

  1. Hand-thrown pottery: Hand-thrown pottery is pottery that is created on a pottery wheel by a skilled potter. This type of pottery is often considered to be more unique and authentic than mass-produced pottery. Hand-thrown pottery can include everything from simple bowls and mugs to more complex pieces like vases and teapots.

    Handmade Pottery Terracotta Utensil Holders With Transparent Glossy Glaze And Hand Painted White Leaves Decor, Have Some Wood Utensils On them And Cinamon sticks And Anise Flowers laying on the ground
    Handmade Pottery Utensil Holder


  2. Rustic pottery: Rustic pottery is pottery that has a rough, natural look to it. This type of pottery is often made from natural materials like clay, and it can have a variety of different finishes, including a raw, earthy finish or a more polished finish. Rustic pottery is often used to create pieces like planters, candle holders, and other decorative items.

    Hand Built Rustic Ceramic Bowl


  3. Functional pottery: Functional pottery refers to pieces that are designed to be used in the home, like dishes, cups, and bowls. These pieces are often made from high-quality materials and are designed to be durable and easy to use. They can be used to serve food and drinks, or simply to decorate the home.

    set of 3 matte blue nesting pottery bowls
    Handmade Pottery Bowl Set


  4. Hand-painted pottery: Hand-painted pottery is pottery that has been decorated by hand. This can include simple designs like stripes or dots, or more complex patterns like flowers or animals. Hand-painted pottery is often considered to be more unique and special than pottery that has been decorated with decals or transfers.

    rustic low relief ceramic tile hand painted with bright colors
    Hand Painted Lighthouse Tile


  5. Ceramic sculpture: Ceramic sculptures are pottery that are more sculptural in nature. They can range from small figurines to large installations. These pieces are often unique and can be considered as a piece of art.


    Handmade Stoneware Octopus Sculpture

Ultimately, the types of pottery that sell best will depend on the preferences of the buyers. However, by understanding what types of pottery are popular, potters and ceramic artists can make informed decisions about what types of pieces to create and how to market them. It's important to note that each artisan should focus on making the pieces they have more skills to make and enjoy the most, as this will result in higher quality and more unique pieces, which will in turn attract more buyers.

Tuesday, January 24, 2023

What are the Trends in Pottery Today? Exploring the Evolution of Ceramic Art

 Pottery, also known as ceramics, is an ancient art form that has been around for thousands of years. However, just like any other art form, it is constantly evolving and adapting to new trends and techniques. In this post, we'll explore some of the current trends in pottery and how they are shaping the future of this timeless craft.

One trend that has been gaining popularity in recent years is the use of unconventional materials in pottery. Many ceramic artists are now experimenting with alternative materials such as paper, found objects, and even garbage, to create unique and thought-provoking pieces. This trend is not only pushing the boundaries of traditional pottery but also making a statement about the environment and sustainability.

Ceramic soap dish decorated witth glass from a used bottle.

Another trend that is currently making waves in the pottery world is the use of technology in ceramic art. With the advent of 3D printing and digital fabrication, many ceramic artists are now incorporating these technologies into their practice, leading to new forms and possibilities. This trend is not only pushing the boundaries of traditional pottery but also making a statement about the impact of technology on art.

Another trend that has been gaining popularity in recent years is the use of bright colors and bold patterns. Many ceramic artists are now experimenting with vibrant colors and bold geometric patterns to create eye-catching and unique pieces. This trend is not only pushing the boundaries of traditional pottery but also making a statement about the impact of technology on art.

Handmade Stoneware Bowl


In addition to these trends, there is also a growing interest in functional pottery. Many people are now looking for functional pieces such as mugs, plates, and vases that not only serve a purpose but also add beauty to their homes. This trend has led to an increase in the number of potters who create functional pieces and has helped to bring pottery to a wider audience.

In conclusion, pottery is an ancient art form that is constantly evolving and adapting to new trends and techniques. From the use of unconventional materials to the incorporation of technology, the future of pottery is bright and exciting. Whether you're a collector, a pottery enthusiast, or an artist, it's worth keeping an eye on these trends to see where the art of pottery is headed next.

What is Handbuilding in Ceramics? Techniques and Tips for Creating Unique Pieces

Handbuilding in ceramics is an age-old technique that involves shaping clay into desired forms without the use of a pottery wheel. This method of ceramic creation allows for a wide range of possibilities, from small trinkets to large sculptures. Whether you're a seasoned pro or just starting out, handbuilding in ceramics is a fun and rewarding experience that can result in truly unique and beautiful pieces.


One of the most popular handbuilding techniques is pinch pottery. This method involves using your fingers to "pinch" the clay into shape, creating a variety of forms such as bowls, cups, and vases. Another popular technique is coiling, which involves building up layers of clay in a spiral shape to create larger pieces such as jars and bottles.

Coil built vase

Another technique that can be used in handbuilding is slab building. This method involves rolling out the clay into flat slabs and then cutting, shaping, and joining the slabs together to create a variety of forms. This technique can be used to create functional items such as plates and platters, or sculptural pieces such as wall hangings.

Handmade ceramic slab built button

When handbuilding in ceramics, it's important to consider the properties of the clay you're using. Different types of clay have different properties, such as porosity and shrinkage rate, which can affect the final outcome of your piece. It's also important to consider the drying and firing process, as certain clay bodies and glazes may require specific temperature ranges and firing times.

To achieve the best results when handbuilding in ceramics, it's also important to invest in quality tools and materials. Basic tools such as wooden modeling tools, rib tools, and wire clay cutters will come in handy when shaping and refining your pieces. Additionally, you should invest in a good-quality clay extruder and a slab roller to make your work more efficient.

In conclusion, handbuilding in ceramics is a versatile and rewarding technique that allows you to create unique and beautiful pieces. Whether you're a beginner or an experienced ceramic artist, this method is a great way to explore your creativity and bring your ideas to life. With the right tools, techniques, and understanding of the properties of clay, you can create truly stunning pieces that will last a lifetime.

Friday, January 20, 2023

Do Handmade Ceramics Break Easily?

Handmade ceramics have a long history, and pieces dating back thousands of years are common.
This demonstrates the strength and durability of handmade ceramics when they are made and handled properly.

It's also important to note that some types of ceramic are known for their strength and durability.
For example, stoneware and porcelain are fired at high temperatures making them stronger and more break-resistant than earthenware.
Dinnerware, kitchenware, and other useful things are frequently made from these kinds of ceramics.


In conclusion, handmade ceramics can be delicate, but they are not necessarily prone to breaking.
The type of clay used, the thickness of the piece, and the firing process are just a few of the variables that affect how strong a piece of handcrafted pottery is.

Handmade ceramics and pottery can persist for a long time with proper care. 

Handmade stoneware plate